In today’s digital world, adding a watermark to your documents can serve multiple purposes, such as branding, security, or identification. Microsoft Word, the widely used word processing software, offers an array of features, including the ability to insert watermarks. This article will provide you with a step-by-step guide and tips on how to insert watermark in Word.
Understanding watermarks
Before diving into the process, it’s essential to understand the concept of watermarks. A watermark is a semi-transparent image or text that appears behind the main content of a document. It can be a logo, copyright notice, confidential label, or any other visually identifiable element.
How to insert a watermark in Word:
1. Launch Microsoft Word
Start by opening Microsoft Word on your computer. Create a new document or open an existing one that you want to add a watermark to.
2. Access the Watermark Menu
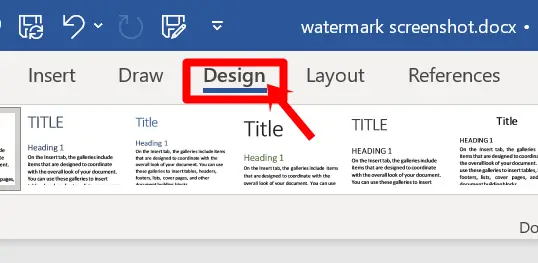
Look for the “Design” tab at the top of the Word window. Click on it to reveal a range of options related to document design and formatting.
3. Select the Watermark Option
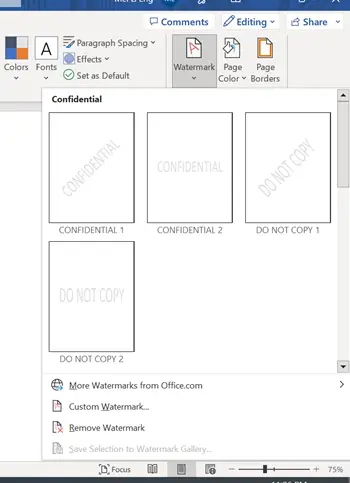
Within the “Design” tab, locate the “Watermark” button. Clicking on it will display a drop-down menu offering various preset watermarks and customization options.
4. Choose a Preset Watermark
If you wish to use one of the built-in watermarks, hover your cursor over the available options to preview them. Select the desired watermark by clicking on it. Word will automatically insert it into your document.
5. Customize the Watermark (Optional)
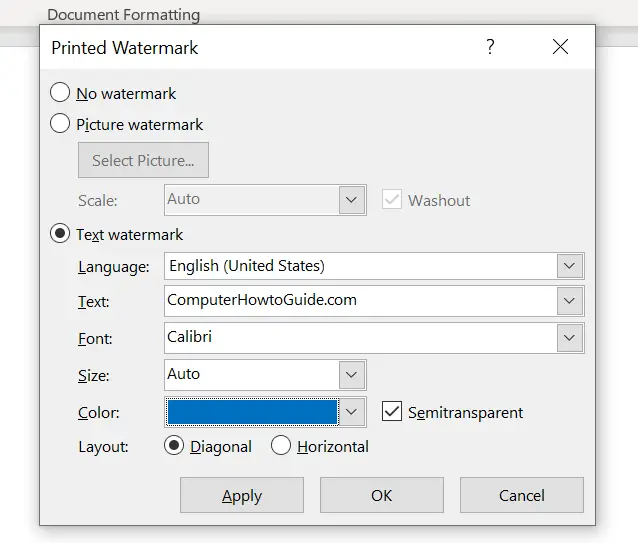
For a personalized touch, Word allows you to customize the watermark further. To do this, click on the “Custom Watermark” option at the bottom of the watermark menu. Here, you can upload your own image or type custom text. Adjust the transparency, size, and orientation to your liking.
6. Apply the Watermark
After choosing or customizing your watermark, click the “Apply” or “OK” button to insert it into your document. The watermark will now appear as a subtle background element on each page.
Additional tips and considerations
- Adjusting watermark position: To reposition the watermark, go back to the “Watermark” menu and select “Custom Watermark.” Use the options provided to adjust the alignment, vertical and horizontal position, and rotation angle of the watermark.
- Removing a watermark: Should you wish to remove the watermark, return to the “Watermark” menu and click on “Remove Watermark.” Word will instantly delete the watermark from your document.
- Saving watermarks as templates: If you frequently use the same watermark design, save it as a template. Access the “Watermark” menu, click on “Custom Watermark,” customize your watermark, and then choose “Save Selection to Watermark Gallery.” This way, you can easily apply it to future documents.
How to insert watermark in Word: recap
With Microsoft Word’s user-friendly interface, inserting a watermark in your documents is a breeze. By following the step-by-step instructions provided in this article, you can effectively enhance your documents with watermarks for branding, security, or identification purposes. Remember to experiment with different designs and settings to find the perfect watermark that aligns with your needs. Start creating professional and visually appealing documents today!
So to recap, here’s how to insert a watermark in Word:
- Launch Microsoft Word
- Access the Watermark Menu
- Select the Watermark Option
- Choose a Preset Watermark
- Customize the Watermark (Optional)
- Apply the Watermark


