As mentioned in Part 1, I’m going to continue sharing my experience of moving from Blogger to self-hosting WordPress. For those who directly came into Part 2, I strongly suggest that you read Part 1 first.
[Read also: Moving from Blogger to WordPress : The How-to Guide Part 1]
Let us continue Part 2.
Moving from Blogger to WordPress
Installing WordPress
Login to HostGator cPanel and look for an icon that says ‘Fantastico De Luxe’ under Software/Services. Click the icon (refer image below).

Click on ‘Fantastico De Luxe’
You will then be brought to the page below. Click > WordPress > New Installation.

WordPress Installation
After clicking New Installation, a new page came out that needs you to enter some details. Fill up those details accordingly and click the > Install WordPress button (refer image below).

Enter the details accordingly
That’s it! You’ve successfully installed WordPress. To see how your new blog looks like on WordPress, simply go to http://YourCustomDomain. It will look something like the image below which obviously the blog is yet to have any real content except the default WordPress post of “Hello world!” and one WordPress default comment.

Your blog on WordPress
Now, let’s go into your WordPress admin site by going to http://YourCustomDomain/wp-admin. On the login page, enter the username and password that you’ve registered on the Fantastico De Luxe page previously. Next, you will come to your WordPress admin dashboard. Delete the default post and comment (refer image below).

Delete the default post and comment
Change Your WordPress Theme
There are a lot of WordPress themes available, either free or you can purchase premium themes from developers. Computer How To Guide is using a free theme from TechMaish.
To install a theme, just go to > Appearance > Themes.
Click on the ‘Install Themes’ tab and directly upload the theme that you prefer. You can also search for themes from the WordPress Themes directory. After upload the theme that you like, click > Install Now.

Upload WordPress theme
Next, activate the theme and that’s it, you are done installing your preferred theme. Due to each WordPress theme has their own ways to tweak the design, I’m not going to talk further about WordPress theme here, you can play around with your theme settings by going to your WordPress admin site > Dashboard > Appearance.
Move Your Content From Blogger to WordPress
You have 2 options here. Either you Import your content via Blogger Importer Plugin or WordPress Importer Plugin. I initially started using Blogger Importer Plugin which I’m going to show to you with screenshots below.
At the left hand side of your WordPress admin site, look for > Tools > Import.
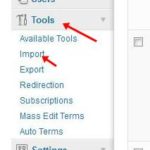
Using Blogger Importer
On the next following page, click > Blogger (as shown in the screenshot below). Follow the easy instructions to install the Blogger Importer Plugin, activate and run the plugin.

Click on ‘Blogger’
After that, you will see a page asking you to authorize WordPress to access your Blogger account so that content in your Blogger account could be imported. Click the ‘Authorize’ button.
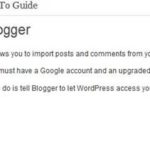
Tell Blogger to let WordPress access your account
Now, please take note. I MET WITH A PROBLEM HERE! Not knowing why, I was not able to go through the authorization. The page below came out to me after I clicked the authorize button above. Apparently, the authorization had failed!
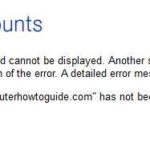
Authorization failed
Solution
Remember I said that you have 2 options to move your content from Blogger to WordPress? Since Blogger Importer had failed, I went for WordPress Importer instead! But before that, login to your Blogger account, go to > Settings > Basic > Export blog (refer image below).
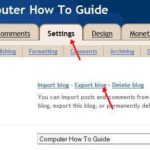
Click on ‘Export blog’
Your Blogger blog will be exported or backed-up in an XML file after clicking > Export blog. Next use this Converter Tool and browse the XML file you’ve exported from Blogger just now and click the ‘Convert’ button (refer image below).

Converter Tool – Convert Blogger export file
The purpose of this step was to convert the Blogger exported XML file into a WordPress exported file so that we could use the WordPress Importer. Basically, this Converter Tool has made the Blogger exported file into a file as if it was exported from a WordPress blog. After clicking the ‘Convert’ button, the file is still an XML file (.xml). Search for that converted file and RENAME THE EXTENSION AS A .wxr FILE (manually change .xml into .wxr).
Next, go back to your WordPress admin site > Tools > Import > WordPress (as shown in the image below). Follow the easy instructions to install the WordPress Importer Plugin, activate and run the plugin.
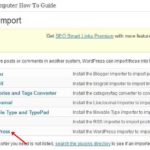
Click on ‘WordPress’
On the next page, just browse the .WXR just now and click the ‘Upload file and import’ button (refer image below).
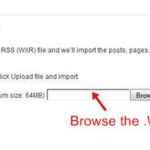
Upload the .WXR file
Depends on how many post and comments from your Blogger blog, the time needed for this upload varies. After the upload had completed, the next thing you’ll know is that your WordPress blog is now already filled with content from your Blogger blog. Problem solved!
Redirect Blogger to WordPress
Now you’ve finally moved all your content from Blogger to WordPress. The next thing you would have to do is to redirect all the links so that you won’t lose your traffic. This is very important as visitors who click on an old Blogger link/URL will be able to reach to your new domain.
To do this, you will have to change your WordPress permalinks structure so that they match your Blogger URL. Go to your WordPress admin dashboard, click on > Settings > Permalinks.
On the Permalink Settings page, select ‘Custom Structure’ and type this : /%year%/%monthnum%/%postname%.html in the empty box and click Save Changes (refer image below).
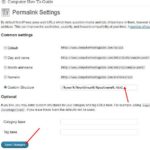
Changing permalinks structure
The Plugins Needed
The plugins below are very important and MUST be installed.
- Permalink Finder
- Blogger 301 Redirect
- Redirection
Permalink Finder Plugin
Blogger has a 39 character limit for its URL, if your post title is longer than this limit, Blogger will shorten the URL. WordPress does not have this kind of limit and that is why you will notice the difference in Blogger permalinks and WordPress permalinks (with custom structure applied). To solve this URL shorten problem, use Permalink Finder plugin. Download the Permalink Finder ZIP file from the link above. DO NOT UNZIP the file, upload it using > Dashboard > Plugins > Add New > Upload. That’s it, no further settings needed for this plugin.
Blogger 301 Redirect Plugin
This plugin is used for one-to-one mapping of post after migration from Blogger blog to self-hosted WordPress blog without showing the annoying “You’re about to be redirected” page to your readers.

An additional step for your readers to overcome, you wouldn’t want this right?
To solve this problem and make your readers skip the annoying redirecting page, use Blogger 301 Redirect plugin.
Go to > Dashboard > Plugins > Add New > Search. Type “Blogger 301 Redirect” to search (refer image below).
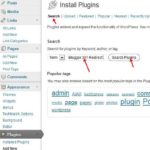
Search Blogger 301 Redirect Plugin
It should be the first one on the list and is developed by Sudipto Pratap Mahato. Click > Install Now.
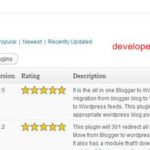
Install Blogger 301 Redirect plugin
Activate the plugin. Go to > Dashboard > Settings > Plugins > Blogger 301 Redirect. Check the 3 boxes as shown in the image below, click > Save Changes. Next, you have to copy the template provided in the box and paste it into your Blogger.
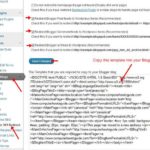
Blogger to WordPress Redirection
Go to your Blogger account > Design > Edit HTML (refer image below).
 At the bottom of this page, click > Revert to Classic Template (refer image below).
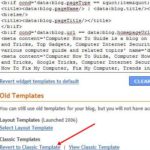
Click on ‘Revert to Classic Template’
You will then come to a page which looks like the one below. IMPORTANT : Copy the HTML code inside the box and save it in notepad just in case something went wrong, you will still have a back up copy.
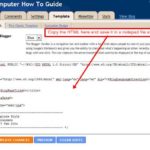
Copy and save the Classic Template HTML code
After you’ve saved the HTML code above as a notepad file, you can now go ahead and delete everything in the HTML box and paste the code from Blogger 301 Redirect plugin. Next, click > SAVE TEMPLATE CHANGES.
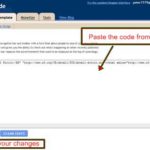
Paste code from Blogger 301 Redirect
After saving your template changes above, you can now check your old blog post, they will all be redirected to the new WordPress blog and most importantly, without the annoying redirecting page!
Redirect Plugin
Before I go talk about installing the Redirect plugin. I would like you to first update your RSS details. Since you are now on WordPress and all your redirects are in placed, updating your RSS details will enable your existing subscribers to receive your new updates and post as well as allowing new subscribers to subscribe your RSS feed. I’m using Feedburner, so I can only talk about Feedburner here.
If you are also using Feedburner for your RSS feeds, login to your Feedburner account and select the blog you would like to change, click > Edit Feed Details (refer image below).

Click on ‘Edit Feed Details’
On the next page, update the feed to your new domain name. The default WordPress feed URL is http://www.YourDomain.com/feed, type this into the Original Feed box and click > Save Feed Details (refer image below).
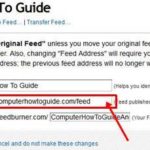
Type your Original Feed url
The next step is to insert this original feed into your WordPress theme. If your theme does not have an area for you to insert RSS feed, please install this plugin : FD Feedburner.
Alright, we have done updating RSS feed. Now back to installing the Redirect Plugin. I’m sure your Blogger blog has some subscribers right? Your Google reader won’t automatically fetch your new blog post without you accomplishing this step. You have to install the Redirect plugin to redirect your existing blog subscribers.
Go to Dashboard > Plugins > Add New > Upload and install Redirect plugin. Remember to activate it. Next, go to the plugin and enter your Feedburner settings. The Source URL should be your Blogger Feed URL which is in the format of : http://yourBloggerblog.blogspot.com/feeds/posts/default, while the Target URL should be your Feedburner URL. After entered all the details, click the ‘Add Redirection’ button (refer image below).
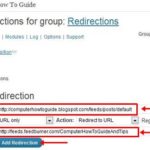
Redirecting feed
That’s it! Congratulations! Your Blogger to WordPress transition is now completed!
What To Do with your Blogger?
You must keep it. But in order not to let search engines penalized you for duplicated content, YOU MUST NOT LET SEARCH ENGINES FOUND YOUR BLOG.
To do this, login to your Blogger account > Settings > Basic (refer image below).

Scroll to the middle of this page and select “No” on Let search engines find your blog? (refer image below).
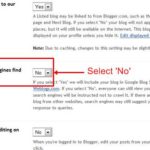
Make blog unsearchable by search engines
Your have now instructed search engines not to crawl your Blogger blog hence, there won’t be any problem with duplicated content.
Another reason you should keep your Blogger blog is that all your old links are still showing in all the search engines. It is better to redirect your potential visitors rather than them getting an error message.
Also, if you hosted all your images on Blogger and you deleted your Blogger blog, all your images will be disappeared. WordPress does not import your images, it only links to them.
Conclusion : Keep your Blogger blog.
Alright, Part 2 has come to an end. I hope my experience in moving from Blogger to WordPress in Part 1 and Part 2 were helpful to you. I think I have covered everything you need to know regarding the transition, do let me know if I have missed out anything.
For those who are looking for some help in moving from Blogger to WordPress can always leave a comment here, I will try my very best to troubleshoot the problem for you.
As for now, I really have to say : Goodbye Blogger, Hello WordPress.

Nice Post peter , Even I’ve Shifted recently but to me SEO is not so crucial so did’nt follow all these steps.
Yup, I could have choose the easier way in the first place but would like to maintain all the links, so eventually went for these steps. You’ve made the right choice in shifting, nice blog you have there Pavan, and we are using the same theme 🙂
With this very informative post that you have shared to us, I am certain that people who are sticking blogging will level up their capability through wordpress. This will really serve as a step for them to be able to achieve more and be skillful enough.
Thanks for the kind words Liane 🙂
Thank you for your VERY informative and helpful series on transitioning from Blogger to WP. I decided to ‘take the plunge’ a few weeks ago. It has been a little bumpy along the way. But, thanks to you and some help from my friends I am succeeding.
I’m glad the article could help Ellie, thanks for visiting. By the way, very interesting blog that you have there 🙂
I just really like the information that you have here that is why I gave a positive feedback about this. Hope that you iwoll be sharing us more of your nice and interesting blog post.
Thank you for your support Liane, stay tuned 🙂
I think a lot of people will find this guide useful as WordPress is becoming more popular and more and more people moving to it. So your work is extremely useful as you save a lot of time that might have been wasteed on thnikung about all the details of such move. Thanks a lot!
The thumbnails of all the posts are not showing up ! What to do ?
Jack,
Thumbnails images won’t show up if you are using this theme by TechMaish, I think it won’t be showing on other themes either. The only way is to choose 1 image from each of your post (if you have multiple images in 1 post), delete them and re-upload so that it is now hosted by your new hosting service. You will have to manually do this on every articles that you have. Good luck.
How did you enabled the thumbnail view on the homepage ? Looks like you have again uploaded all the images to your WordPress blog, and then embedded them in the posts ! BTW, if you had used any plugin to do so, please let me know !
I wished there was a plugin outhere to do the job. Yes you are right Priyangshu, I re-uploaded all the images that I would like to be shown as thumbnails without the help of plugins. There’s no plugin to do such a job at the moment.
Hi Peter!
When I was starting my website 5 years ago, I was actually posting to two mirror blogs.. my blogger, and my wordpress. After months of both, I preferred blogger, over wordpress. It was easy to use, syncd with my google account, and page ranking with google was better than wordpress.
Do you have any reason why you like it better than blogger?
It’s actually more of a Self-Hosting vs Free-Hosting thing rather than Blogger vs WordPress Kimmy.
The downside of free hosting a blog(Blogger/Free hosted WordPress) is that bloggers have to be very aware of the site’s terms of services. If failed to abide, your account will be terminated and your blog deleted.
On the other hand, self-hosting a blog gives the blogger a lot more control over what can be put on their site. There are more choices functionality to add, like more plugins and more theme choices. You have more control on a self-hosted blog and that’s why I switched.
Thanks for the comment Kimmy.
Hi Peter,
I just want to add that after moving from Blogger to WordPress, don’t forget to install the necessary plug-ins like all in one SEO and commentluv.
Yeah, those are good plugins Veronica. Also the possibility of using plugins is one of the reasons I switched to WordPress.
Thanks for the tutorial, i found it very understanding with such accurate detail. I was having problems installing wordpress by myself, but reading this post has taught me a lot about the installaiton.
Very Nice tutorial. There are so many steps involved for migration OMG. But its interesting. thanks for step by step guide.
Thanks Andy. Yeah there were many steps involved but I had fun and had learned a lot 🙂
Really,your article is informative.
It seems you explained everything by image.
I tried to make it as detail as possible that’s why I captured all the screenshots from my blog transition. Hope it helps. Thanks for stopping by Mr. Bhavesh.
Bro your tutorial is very great I easily transfer blogger to WordPress